Spring Boot Initialization
Spring Boot
How to spin a new application from scratch using Spring Boot?
Introduction
I got a chance in the beginning of last year to explore Spring Boot as part of the modernizing effort at work. Within few minutes, I realized how easy is to spin a new application from scratch using Spring Boot. From that moment onwards, all my new applications are Spring Boot applications.
About This Post
This first post is part of Spring Boot series. In this post I will explain how to create a simple spring boot application and running it in the local machine.
First Thing First
Spring Boot makes it easy to create stand-alone, production-grade Spring based Applications that you can “just run” – Spring Boot Project
It is a opinionated platform with Spring & other 3rd party libraries to bring up an application with less configuration.
Since it runs on top of Spring platform it supports all spring configurations and annotations.
Creating The Application
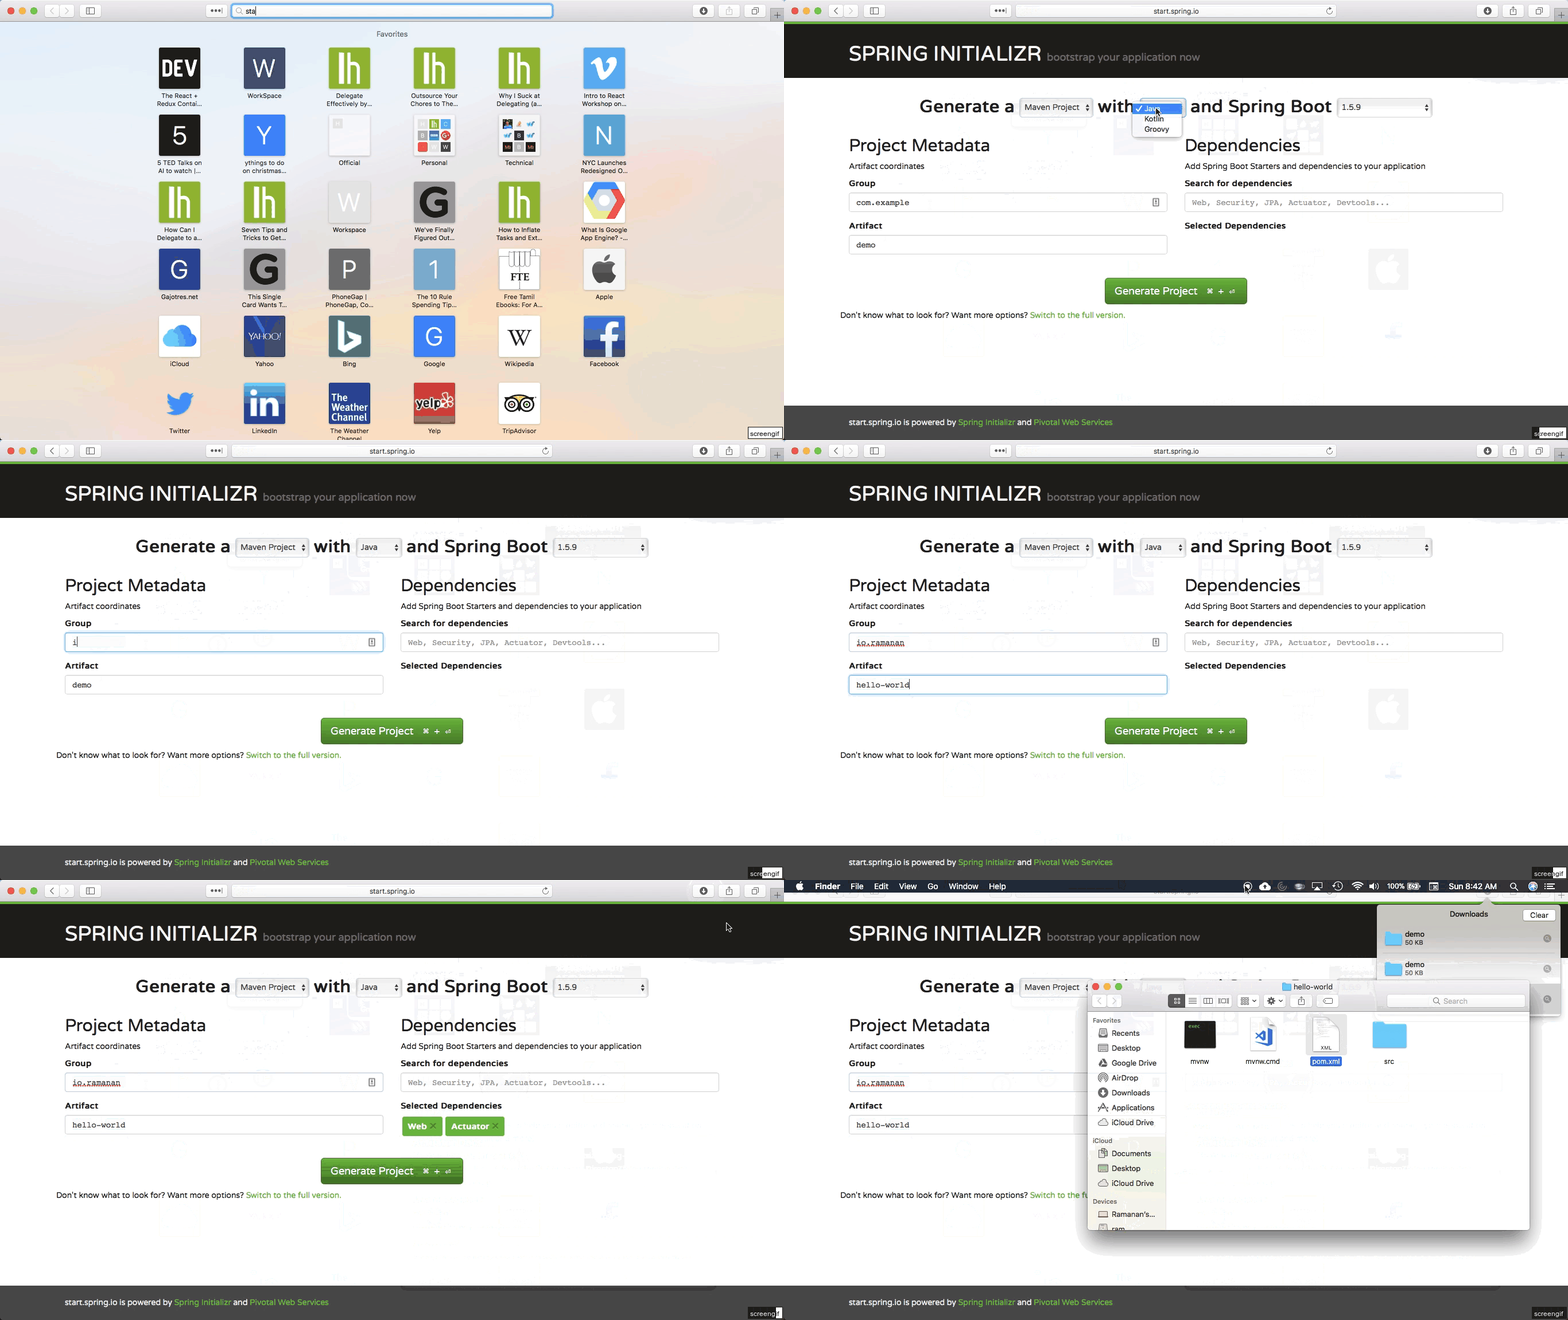
I followed the below steps to create a project with minimum dependency:
- Go to Spring initializr
- Notice, at the top of the page there are few drop boxes to create
MavenorGradleProjectJava,KotlinorGroovyProject- Spring Boot Version (note: this is not Spring version) - We are using the latest stable version (which is
1.5.9at the time of this post creation)
- Type the group name (
io.ramananin my case) - Type the artifact name
hello-world - In the Dependencies section I am selecting
webandactuator(I will explain about actuator in a different post - but this is optional) - Hit Generate Project button to download the maven project

Now you have generated a maven project with necessary dependency to run a Spring Boot application.
Now let us see the important files created by the Spring Intializer.

pom.xml
This is the most important file in the created project. If you notice the file, it has three dependencies
- web
- actuator (for later post)
- test (default)
These dependencies pull all the necessary jars including tomcat jars to run the application without any other configuration.
HelloWorldApplication.java
This is a simple java main class. The important part here is the @SpringBootApplication annotation. This annotation tells Spring that this is a Spring Boot application.
application.properties
For this post we are not going to use this file, but this is very important file for any application specific configurations.
Running the application
Use the below maven command at the project root location to build and run the application in the local machine.
mvn clean spring-boot:run
Since I already have most of the jar files downloaded by maven, the build process is very fast in my machine. But it can take few more minutes based on the jar file size and the internet speed at your machine.
Now, if you go to http://localhost:8080 you can see the application up and running.

Note: Since there is no 404 page configured, the browser is showing default error page.
In the next post, I will explain how to create a simple rest service.
PS: This is my first post, there could be mistakes, errors here. Please reach me out in twitter if you find any. Thank you.