REST Service Using Spring Boot
REST Service
How to create a REST service using Spring Boot?
Introduction
In my last Spring Boot post, I showed you how to initialize a spring boot application from scratch. In this post, I will show you how to create a rest service using Spring Boot and Spring REST Controller.
About This Post
This is the second post on the Spring Boot series. In this post I will explain how to create a simple rest service using spring boot and running it in the local machine.
REST or RESTful Service
Representational state transfer (REST) or RESTful web services are a way of providing interoperability between computer systems on the Internet. REST-compliant Web services allow requesting systems to access and manipulate textual representations of Web resources using a uniform and predefined set of stateless operations. – Wikipedia
In my opinion the rest service is the simplest way of exposing the system functions for the external system to access or update.
If it is a GET service then the service can be easily accessed using web browsers. All the web pages including this post are rendered by the same mechanism. If the service expecting any HTTP Headers then it has to be manipulated, otherwise it is just invoking the url from the browser.
Hello World!
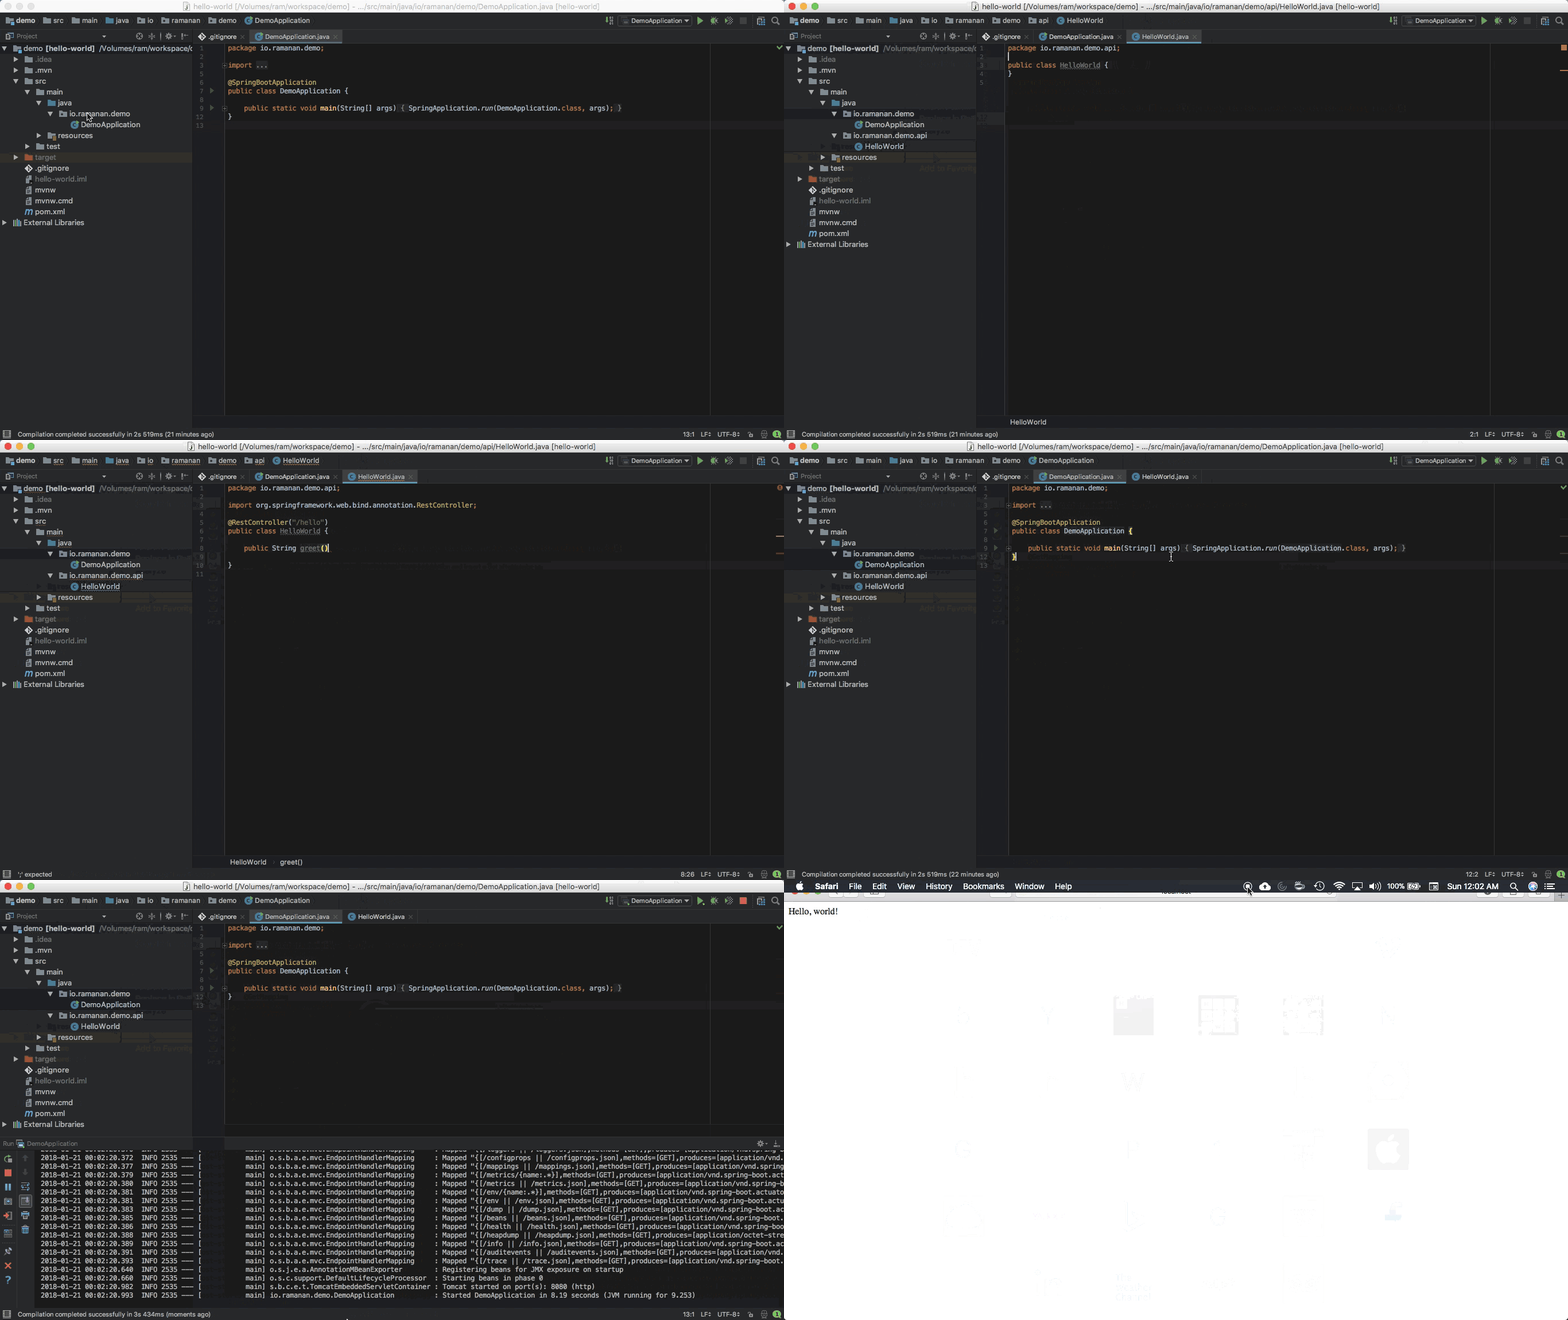
I will use the same application created as part of the previous post and add a new rest controller.
Let’s create a service, which returns Hello, world! when you invoke a url. Follow the below steps:
- Create a new package inside
src/java/calledio.ramanan.demo.api. - Create a new java class called HelloWorld.java
- Annotate the class as
@RestControllerand specify the path/hello. So the annotation will be@RestController("/hello"). - Create a public method and annotate the method as
@GetMapping. - Return
Hello, world!at the end of the method. - Run the application and access the url
http://localhost:8080/hello

Passing Values
The values can be passed as Path Variable like /ramanan or Request Param like ?name=ramanan.
Path Variable
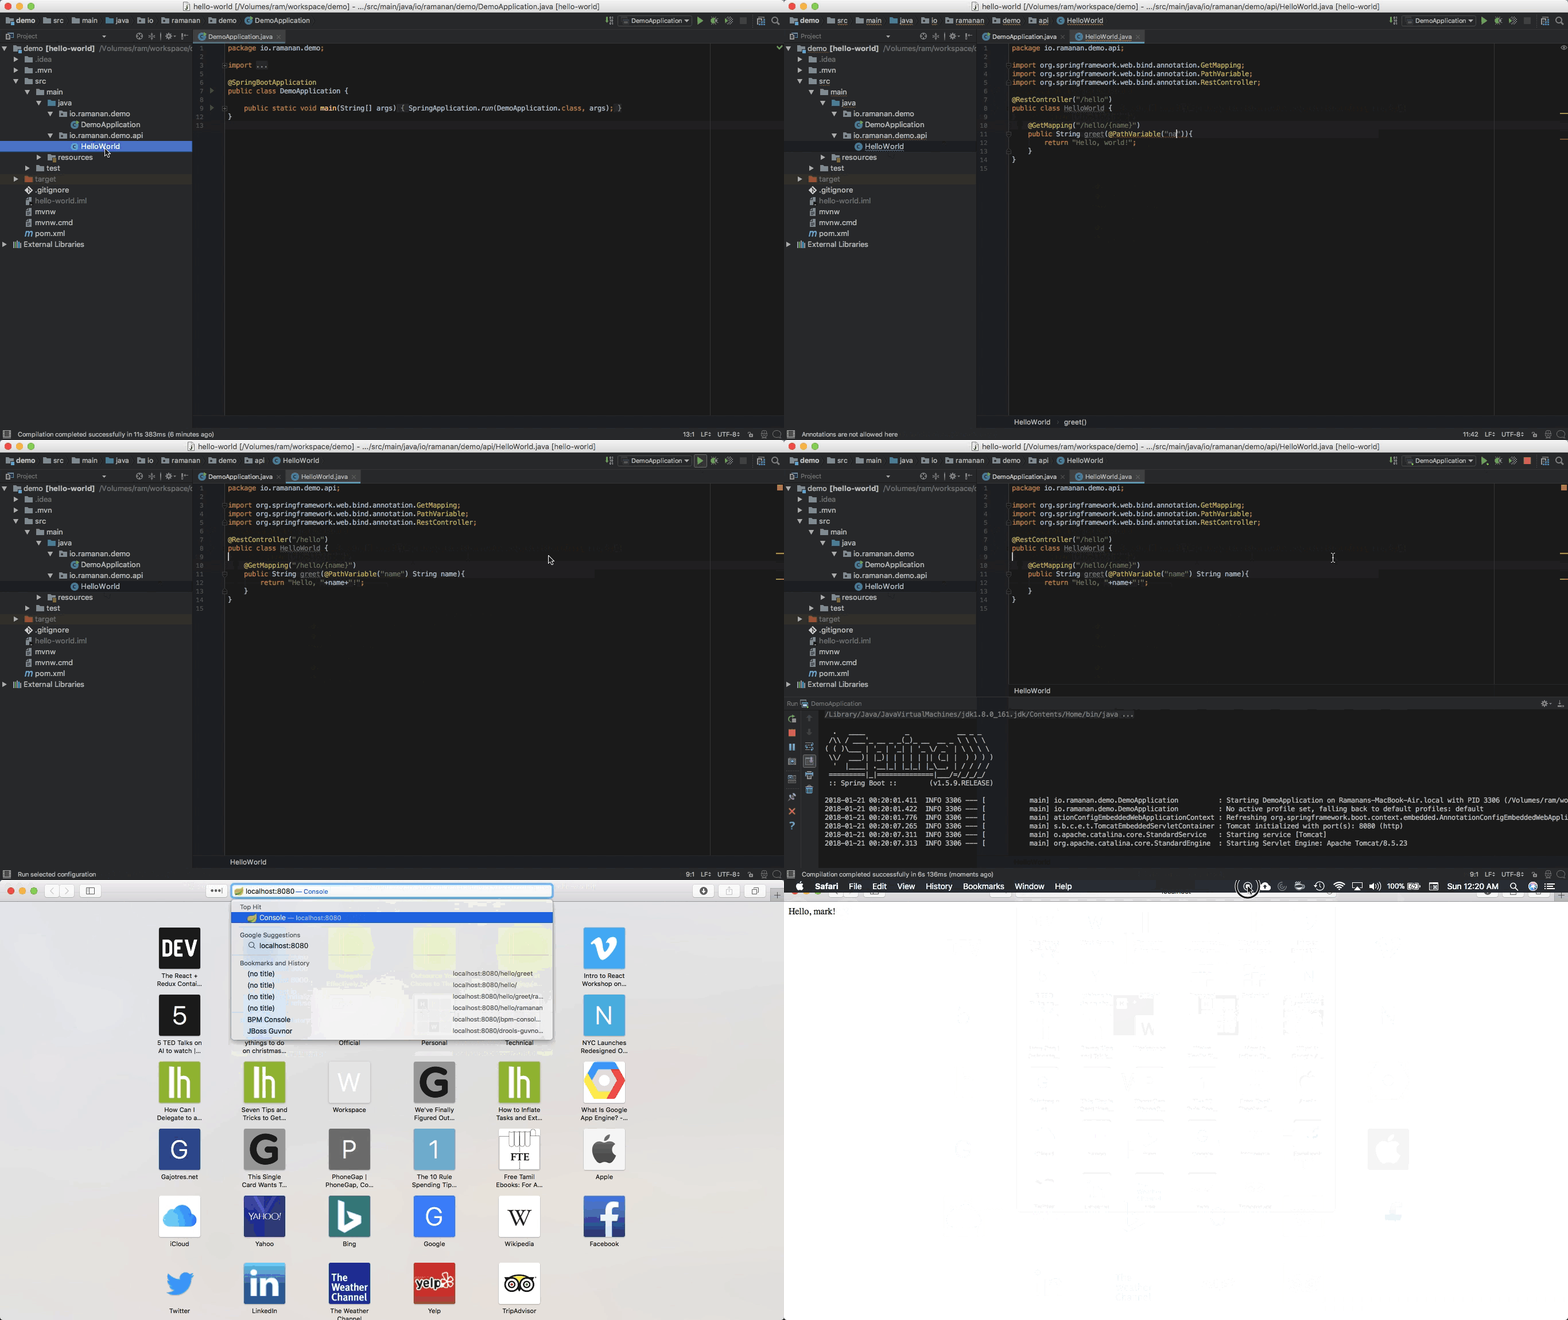
Let’s enhance our service to include the path variable.
- Update the
@GetMappingannotation with the path value like@GetMapping("/hello/{name}"). - Introduce the argument to the method
public String greet(@PathVariable("name") String name). - Run the application and access the url
http://localhost:8080/hello/ramanan

Request Param
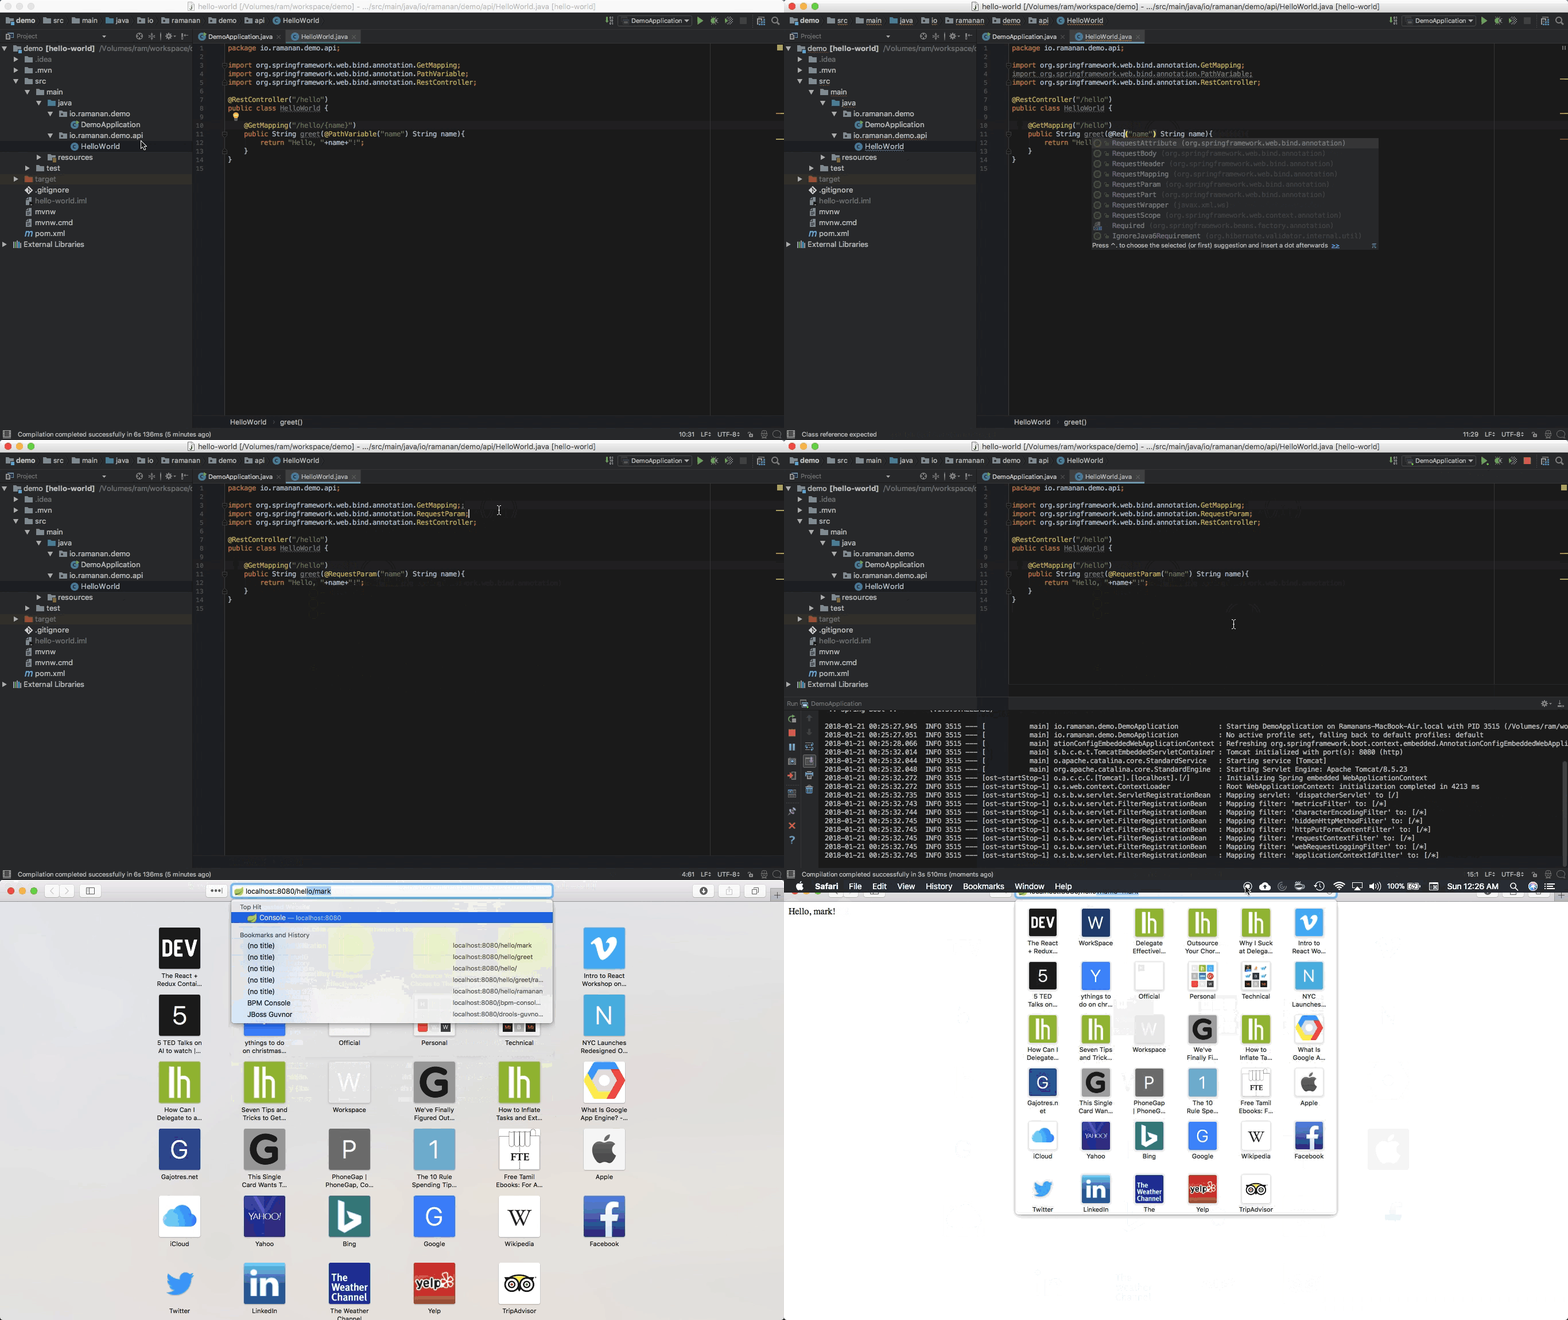
In other way we can pass the value as query parameter or also called request parameter. Let’s see how to do that.
- Update the
@GetMappingannotation with the path value like@GetMapping("/hello"). - Introduce the argument to the method
public String greet(@RequestParam("name") String name). - Run the application and access the url
http://localhost:8080/hello?name=ramanan

Conclusion
We have created a simple rest service, which accepts input value and returns response based on the input. In the next post, I will show you how to test this service using @SpringBootTest.
Please feel free to reach me out in twitter if you have any question.